Learn how to take, send, and create screenshots in Make (Integromat) with the PagePixels Screenshots integration.
Introduction
With the PagePixels Screenshots Make app, you can automate the process of taking, creating, and sending screenshots between the thousands of services Make.com supports, such as:
Creates a screenshot from any custom HTML you provide. This makes it easy to take a screenshot of new emails, create custom reports from third-party APIs, and more.
Create a Real Geolocation Screenshot of a Web Page
Captures a screenshot from real geolocations around the world. Screenshots are taken through a proxy network within the geographical location you specify. Choose from hundreds of countries and any US State for your geolocation testing needs.
Create a Screenshot of a Web Page and Analyze the Image with AI
Captures a web page screenshot and runs an AI visual analysis based on your prompt. Useful for extracting data, generating summaries, or querying the website's content. No additional setup is required.
Creates a recurring screenshot of a web page on a schedule you define. You will receive the Embed URL as a part of the response. The Embed URL always displays the latest screenshot taken for this configuration, so it can be used on public websites, dashboards, and internal systems directly, with no API key.
Analyze any Image with AI
Creates an AI visual analysis of any image guided by a text prompt. Submit up to 5 images and 5 prompts. Useful for comparing images, tracking changes, monitoring visual regressions, and extracting text. No additional setup is required.
Initiates a new Domain Research Report request. This action can help automate domain research and structured data extraction from domains and websites. Provide a list of URLs and request up to 100 custom data fields for extraction (e.g. email, company details, product info) guided by your AI prompts.
Extracts the fully rendered raw HTML source code of a web page (instead of taking a screenshot). This action is optimized for fetching HTML content from websites that dynamically generate their HTML using JavaScript.
Get a Screenshot Configuration
Gets the requested Screenshot Configuration, including all associated IDs and the Embed URL for the latest screenshot.
Update a Screenshot Configuration
Updates the Screenshot Configuration and immediately begins taking a screenshot with the new configuration.
Delete a Screenshot Configuration
Deletes the Screenshot Configuration and all screenshots associated with the configuration.
Make an API Call
Performs an arbitrary authorized API call. Helpful for accessing PagePixels features not yet available through Make, but accessible through the PagePixels API.
How to connect PagePixels Screenshots to Make
Below are the steps for connecting your PagePixels Screenshots account to Make:
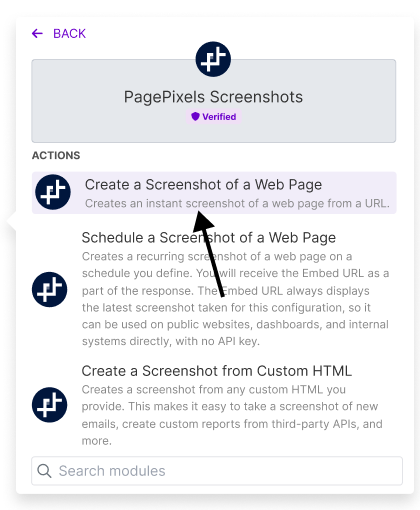
Search for and click on the PagePixels Screenshots app.
Select a Trigger or Action module
4
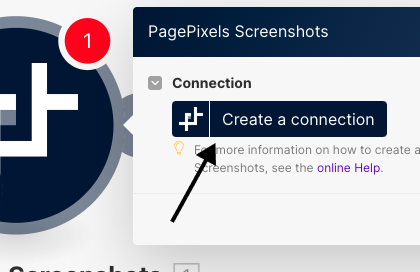
Click Create a Connection
5
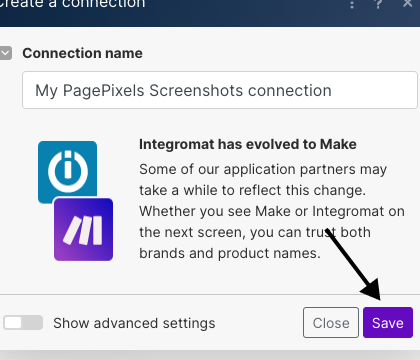
Name your connection and click Save
6
Authenticate your PagePixels account.
Once you successfully connect your PagePixels account to Make, you’re ready to start automating your screenshots.
How to automate screenshots in Make.com
Below are examples to help demonstrate how you can automate screenshots in the Make.com platform.
CREATE A SCREENSHOT EXAMPLE
How to take, download, and send screenshots to your Google Drive
Using the PagePixels "Create a Screenshot of a Web Page" Action, you can automate taking screenshots of web pages within Make.
To demonstrate, we're going to create a Scenario that takes a screenshot, downloads a copy of the screenshot, and saves the image to Google Drive.
REQUIREMENTS
A PagePixels account connected to Make,
A Google Drive account connected to Make,
A link to the website you want to screenshot.
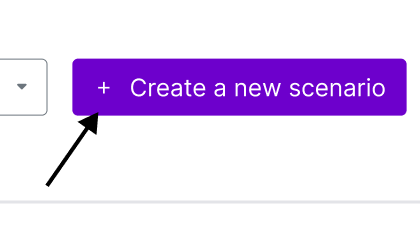
1
Click the
+ Create a new scenario
button
2
Add the PagePixels
Create a Web Page Screenshot
Action
Search for and click on the PagePixels Screenshots app.
Select "Create a Screenshot of a Web Page"
3
Configure your screenshot
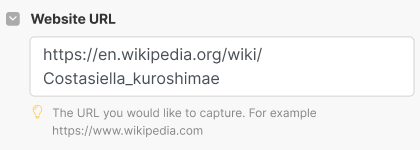
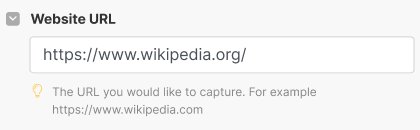
Copy and paste your web page URL into the "Website URL" field (required).
All other fields are optional. When you're done configuring your screenshot, click the "OK" button.
4
Add the HTTP
Get a file
Action
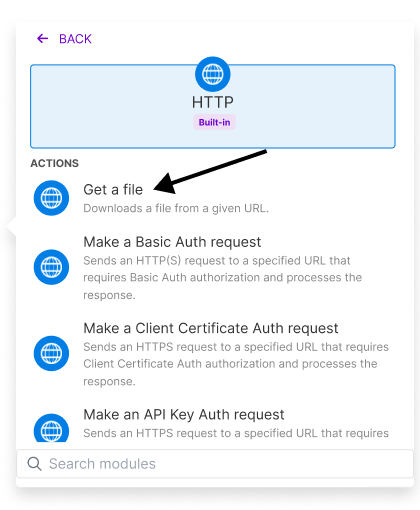
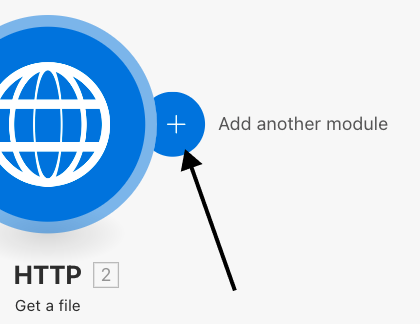
Click the "Add another module" button.
Search for and click on the "HTTP" app and choose the "Get a file" Action module.
5
Configure the
Get a file
Action to fetch the screenshot
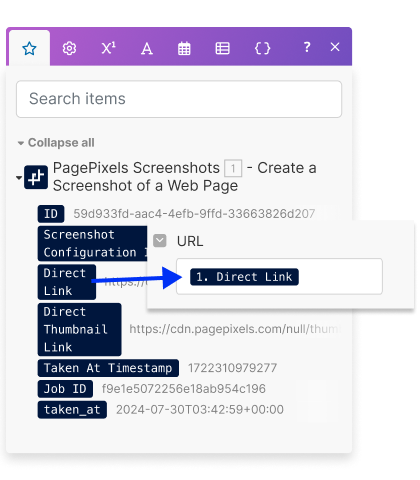
In the "Get a file" module, click into the "URL" field, and select the "Direct Link" item option.
Click the "OK" button at the bottom.
6
Add the Google Drive
Upload a file
Action
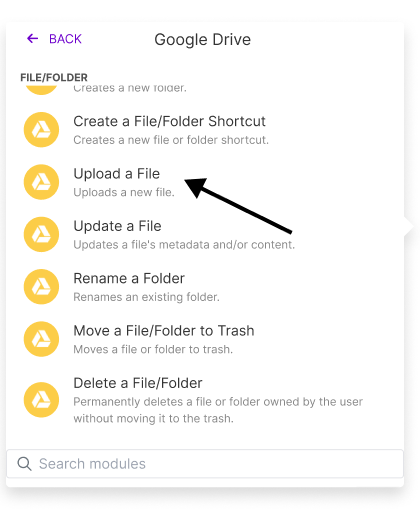
Click the "Add another module" button.
Search for and click on the "Google Drive" app and choose the "Upload a file" Action module.
7
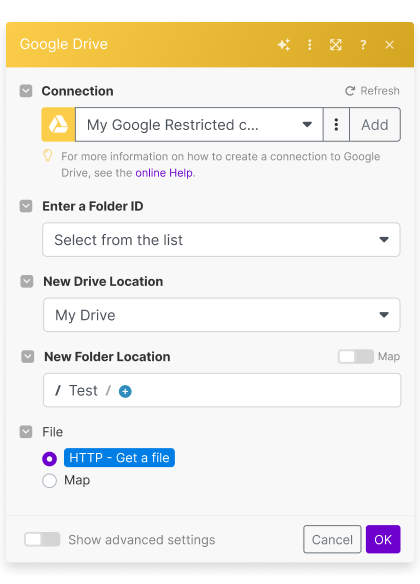
Configure uploading your screenshot file to Google Drive
The File field should auto-select the HTTP - Get a file item option for you.
Complete the other fields to your preference. When you're done, click the "OK" button.
Note - after clicking the "OK" button, an red error bubble may appear on your Google Drive module. To clear the errors, click into the module, and click the "OK" button again.
8
Test your Scenario
Click on the "Run once" play button to test your scenario.
After a successful test run in Make, you should see a screenshot image file appear in your Google Drive.
9
Turn on your Scenario (or add another Action)
To have your Scenario run automatically, toggle the scheduling toggle (bottom-left) to the "ON" position.
🎉 Your Scenario is now complete and by default, it will run every 15 minutes.
CUSTOM HTML EXAMPLE
How to create screenshots of your Microsoft 365 Outlook emails
There's countless things you can do with the PagePixels "Create a Screenshot from Custom HTML" Action in Make, but one common use case is creating screenshots of emails.
To demonstrate how you can do this, we're going to create a Scenario that automates creating screenshots of new email messages in Outlook (Microsoft 365 Email).
REQUIREMENTS
A PagePixels account connected to Make.
A Microsoft 365 Outlook email account connected to Make.
1
Click the
+ Create a new scenario
button
2
Add the Microsft 365 Email
Watch Messages
Trigger
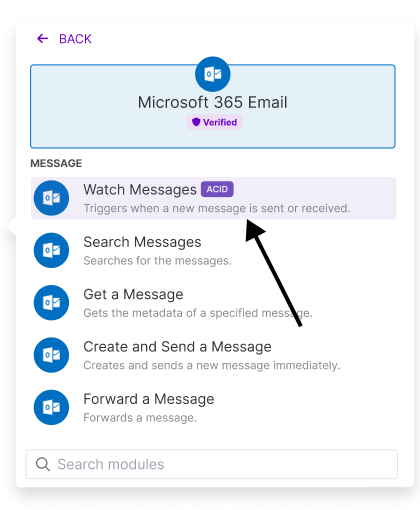
Search for the Microsoft 365 Email app and select the "Watch Messages" Trigger.
3
Configure your
Watch Messages
Trigger
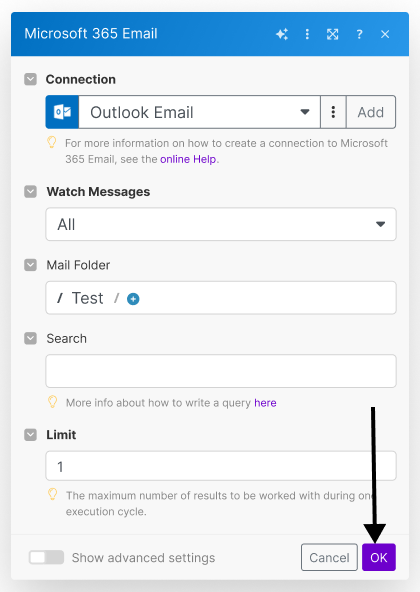
Choose when to Make should start watching for new email messages, and click the "OK" button.
Next, specify which new emails you want to use in your automation.
For example, in the image below we chose to watch only messages in a specific folder, called Test.
When everything looks good to go, click the "OK" button.
4
Add the PagePixels
Create a Screenshot from Custom HTML
Action
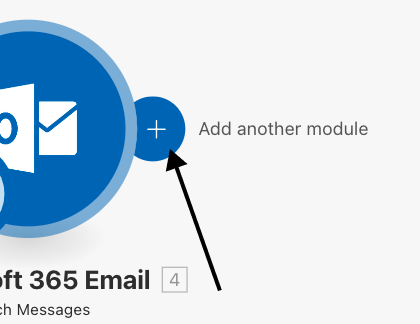
Click the "Add another module" button
Search for and click on the "PagePixels Screenshots" app and choose the "Create a Screenshot from Custom HTML" Action.
5
Configure your screenshot
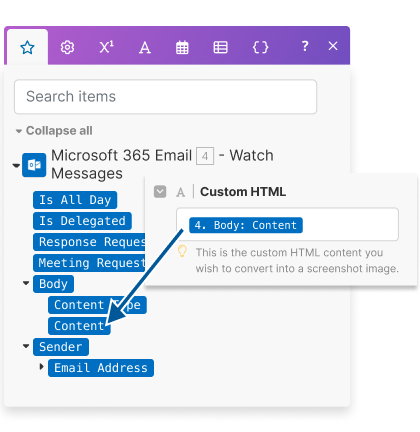
Click into the Custom HTML field and select the "Body: Content" data item from the "Watch Messages" module.
(This item contains the HTML for your email)
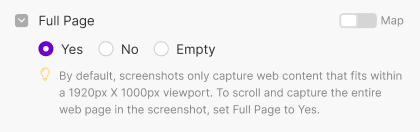
To have the entire email appear in the screenshot, scroll to the "Full Page" field and select the "Yes" option.
Once you're done configuring your screenshot, click the "OK" button.
6
Test your Scenario (optional)
Click on the "Run once" play button to test your scenario.
Important note:
To test the full scenario, requires a new email in your Outlook account that meets the conditions set in the "Watch Messages" Trigger.
7
Turn on your Scenario (or add an Action)
To have your Scenario run automatically, toggle the scheduling toggle (bottom-left) to the "ON" position.
🎉 Your Scenario is now complete and will automatically run when the conditions of the "Watch Messages" trigger are met.
Multi-Step Screenshots in Make
Use PagePixels Multi-Step Screenshot feature in Make.com to interact with websites before capturing a screenshot, so you can:
Fill out a password login form,
Perform a search,
Apply filters,
Navigate to another page,
And more.
PagePixels Multi-Step works by making browser actions (click, input text, press enter, etc.) available for you to add, and then PagePixels runs those actions for you before taking the screenshot.
You can access Multi-Step functionality through the
"Multi-Step Actions"
field in the following Action modules:
Create a Screenshot of a Web Page
Scheduled a Screenshot of a Web Page
Create a Screenshot from Custom HTML
Create a Real Geolocation Screenshot of a Web Page
Create a Screenshot of a Web Page and Analyze the Image with AI
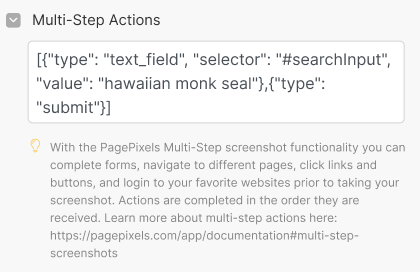
Multi-Step Actions
Here's a list of browser actions (aka "Multi-Step Actions") you can use, and what the expected format is for Make.
Make sure to escape special characters (e.g. quotes "", '') in your Multi-Step Action inputs. Otherwise, you'll get an error or your actions will not work as intended.
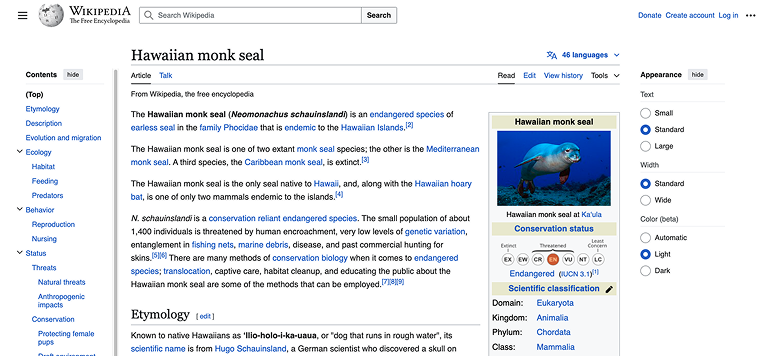
This action will input the text value "hawaiian monk seal" into the search text field identified by a CSS selector (#searchInput).
{"type": "submit"}
This action simulates pressing the "Enter" key to submit a form. In this case, it submits our search to Wikipedia.
📝 Notes
The screenshot generated in this example uses the default settings for "Page Width" (1920px), "Page Height" (1000px), and "Wait Time to Capture Screenshot" (1500ms). Feel free to change these settings in Make to fit your needs.
To learn more about Multi-Step and see more examples of how to use this feature in Make, check out our Multi-Step Help Guide.
Have questions about Multi-Step Screenshots? Contact us:
support-tickets@pagepixels.com
Website Domain Research in Make
Using PagePixels'
Create a Website Domain Research Report
Action in Make.com, you can analyze and extract structured data from websites and domains in bulk, guided by your custom AI prompts.
With Website Domain Research, you can provide just the primary domain (example.com), and our system will crawl the website to find whatever information you need. Or if you want a more focused extraction, you can provide the full URL for the web page.
Once we've processed your domain research request, you can access it in an easy-to-use, clean, structured format for your Make Scenarios. No web scraped mess.
You can try PagePixels' Website Domain Research functionality for free. Free accounts get 25 free monthly credits (1 domain = 1 credit). Paid subscribers get 125 free monthly credits.
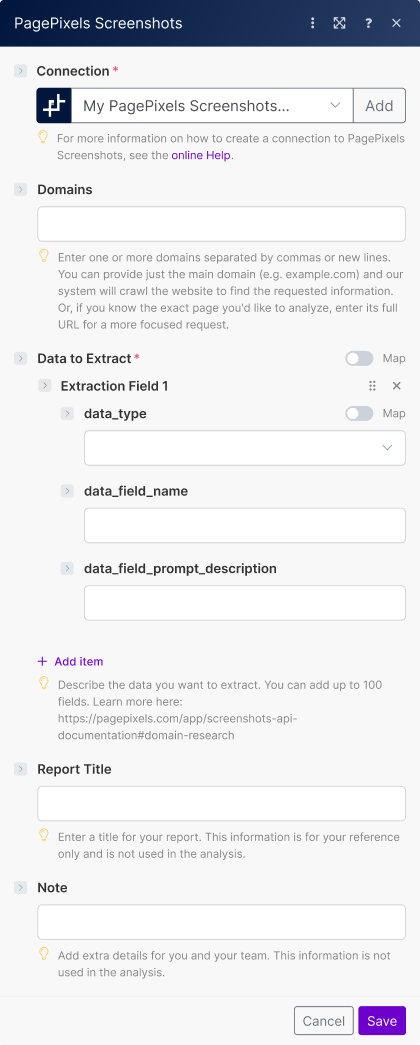
About Create a Domain Research Report Action fields
To use the
Create a Website Domain Research Report
Action in Make, you'll need to provide the following information.
Domains (required)
Enter one or more domains or websites. You can add the domains you want to analyze manually or you can use data from another Make app (e.g. Google Sheets, Microsoft Excel).
NOTE: You can use commas or new lines as delimiters.
Data To Extract (required)
Describe the data you want to extract using data_type, data_field_name, and data_field_prompt_description inputs as described below.
Key
Description
data_type
The data type you expect. Select "String", "Number", "Boolean", or "Array" from the drop-down menu.
data_field_name
The name for the field. Max 100 characters (no spaces). Example: primary_phone_number
data_field_prompt_description
An AI prompt describing the data you want to extract. Max 2000 characters. Example: The main email address listed for sales or partnership inquiries
Note: You can analyze up to 100 custom "Extraction Field" items per report. Each "Extraction Field" item contains a single data_type, data_field_name, and data_field_prompt_description field input.
Report Title (optional)
Give your report a name for easier reference and differentiation. This information is not used in the analysis.
Additional Notes (optional)
Add extra details about the report for you and your team. This information is not used in the analysis.
Example: How to automate qualifying leads in Make
Let's suppose you have a list of company domains and want to identify which ones are high-quality by giving them a lead score based on a set criteria.
For example, the criteria could be that they need to be a B2B company, have a team over 50 people, and offer a cloud-based solution.
In addition, you decide to gather details like phone numbers, social media profiles, and whether or not they have an investor page.
Here is an example configuration of how you can automate this process using the PagePixels Screenshots
Create a Website Domain Research Report
Action in Make.
Example Breakdown: Data To Extract
String Example
Crawls the domain to find a business or sales phone number. Note: When the data you want is a phone number, you'll want to use String as the data type (not Number).
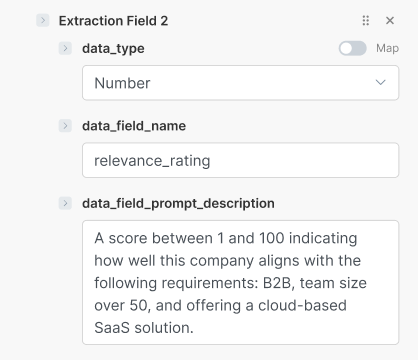
Number Example
The AI analyzes the domain based on the provided criteria and determine what number between 1-100 best represents how close it matches the criteria (the higher the number the better the match).
Boolean Example
Checks if the website has an investor page. If it does, returns “t” for true. Otherwise returns “f” for false.
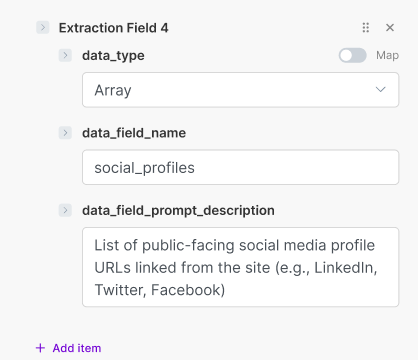
Array Example
Looks for the website's social media links and returns them as an array.
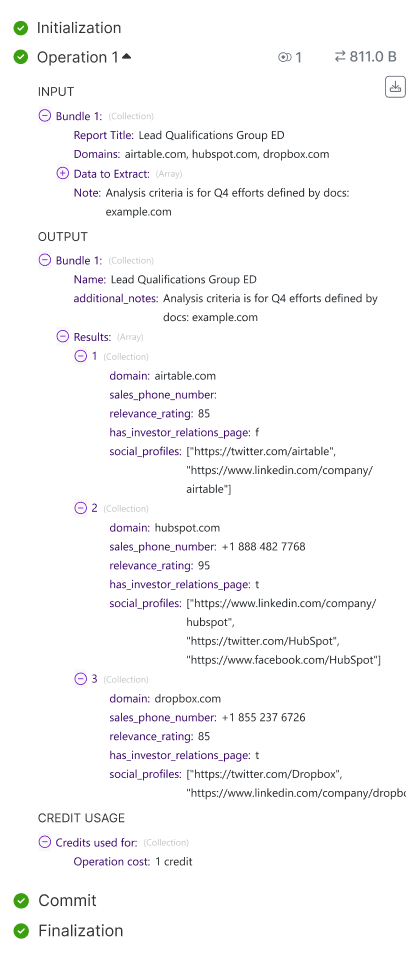
Example Output
Once you're satisfied with your configuration inputs, you can click "Save" and run the module.
If successful, the action will return the data you requested for extraction in a clean format you can use in a subsequent app.
For Example
_______________________
Need help using Website Domain Research in Make? Contact us: