Guide to automating screenshots with Power Automate
Learn how to take automatic screenshots in Power Automate with the PagePixels Screenshots integration.
Introduction
With the PagePixels Screenshots Power Automate connector, you can automate the process of capturing screenshots directly within your Power Automate workflows.
You can also send your screenshot images to apps supported by Microsoft Power Automate, including:
This guide goes over what the PagePixels connector can do, how to connect PagePixels to Power Automate, how to schedule screenshots in your flows, and how to create Multi-Step screenshots.
What Actions are Available?
Below is a list of Actions you can perform using the PagePixels Screenshots Power Automate connector.
Actions
Take a Screenshot of a Web Page
Creates an instant screenshot of a web page from a URL.
Take a Screenshot of a web page and analyze the image with AI
Captures a web page screenshot and runs an AI visual analysis based on your prompt. Useful for extracting data, generating summaries, or querying the website's content.
How to connect PagePixels Screenshots to Power Automate
Below are the steps for how to connect your PagePixels account to Power Automate:
1
Login to Power Automate
2
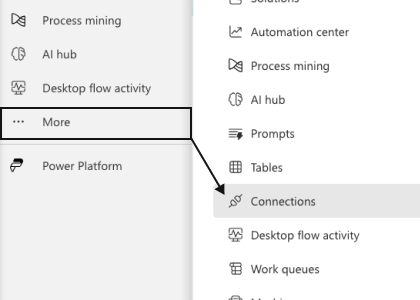
Go to your Connections page
In the left side-bar, click More and select Connections.
3
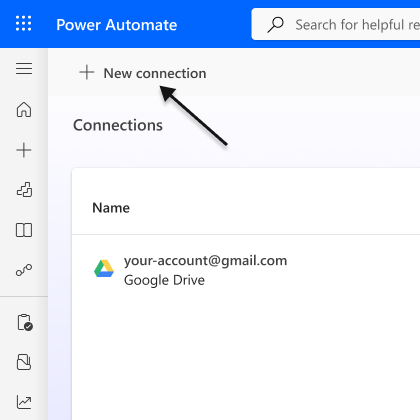
Add New Connection
Click the + New Connection button (top-left).
4
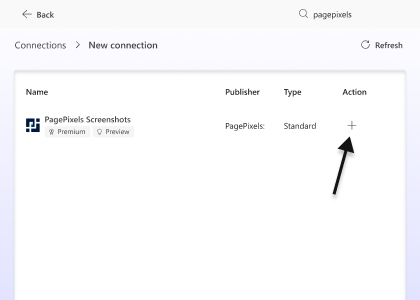
Add PagePixels connection
Search for PagePixels (top-right). Under Action click the + button.
5
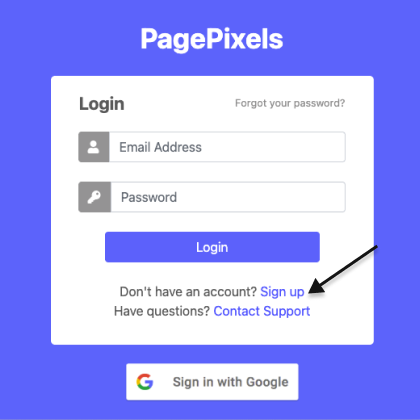
Authenticate your PagePixels account
Log in to PagePixels or click Sign up to create a free account.
6
Authorize the connection
Click the Authorize button.
7
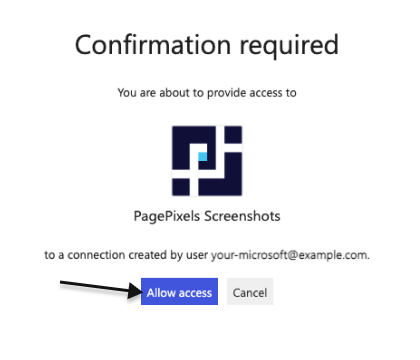
Confirm connection
Click the Allow access button.
Once you've successfully connected your PagePixels account to Power Automate, you're ready to start automating your screenshots.
How to automate screenshots in Power Automate
Take a Screenshot of a Web Page EXAMPLE
How to create a daily screenshot flow
Using the PagePixels Take a Screenshot of a Web Page Action, you can automate taking screenshots of web pages on a recurring schedule within Power Automate.
For example, below are step-by-step instructions for how to create a daily website screenshot flow in Power Automate:
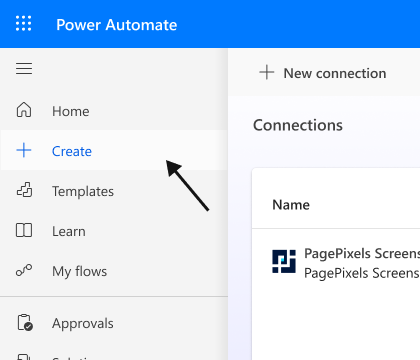
1
Create a new flow
Click the + Create button.
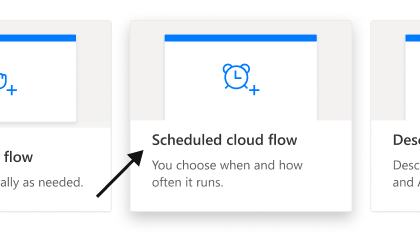
2
Schedule your automation
Click the Scheduled cloud flow option.
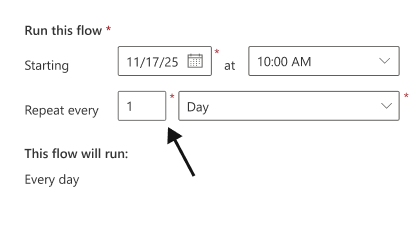
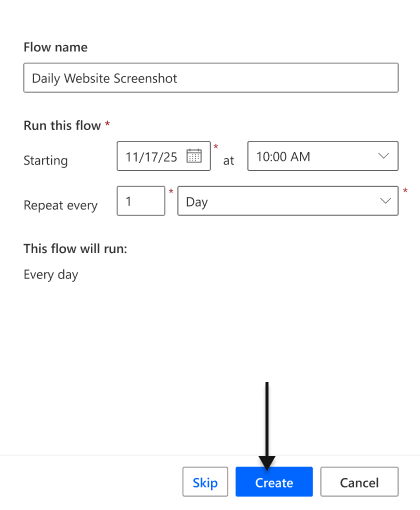
Configure your schedule. For a daily screenshot, set the Repeat every field to the 1 Day option.
Click the Create button.
3
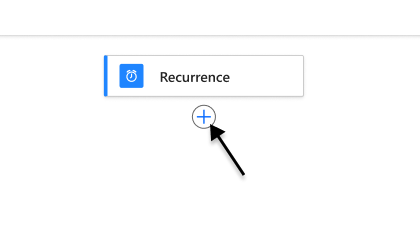
Add PagePixels Action
Click the + button.
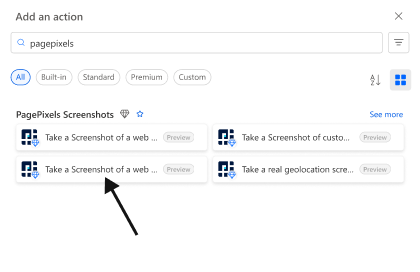
Search for PagePixels. Select the Take a Screenshot of a Web Page action.
4
Configure your screenshot
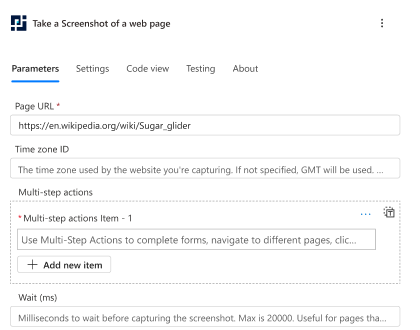
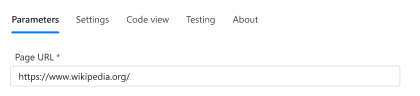
Copy and paste your website link into the Page URL field.
Configure your screenshot to your needs with over 20+ options. Note: Page URL is the only required field. All other fields are optional.
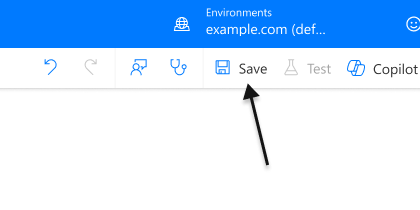
Once you're done, click the Save button.
5
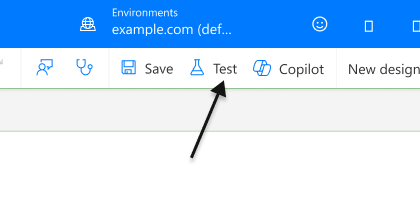
Test your Flow
Click the Test button.
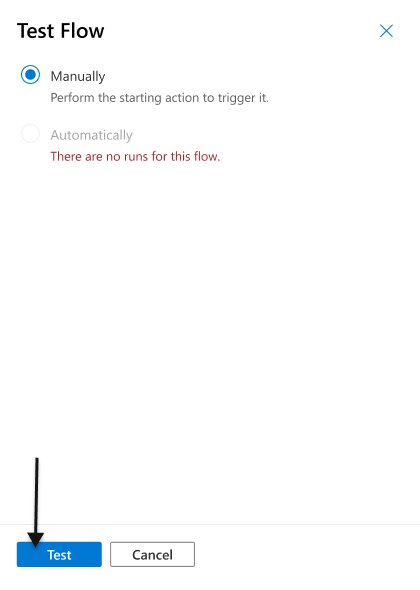
Select the Manually option. Click Test.
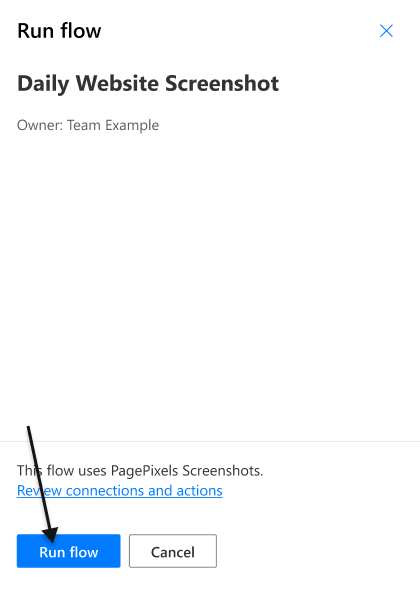
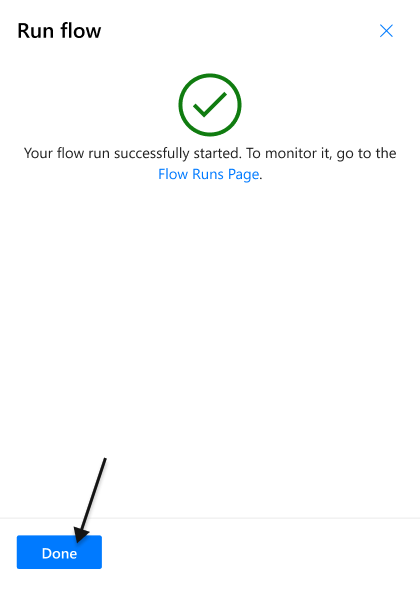
Click Run Flow.
Click Done.
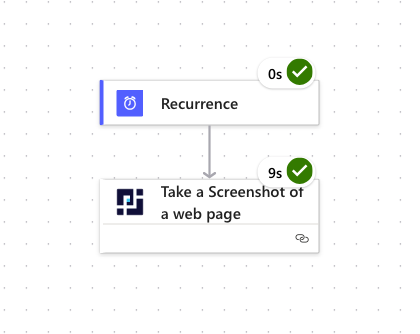
After a successful test run in Power Automate, you'll see green checkmarks appear.
🎉 Your Flow is now complete and will automatically take a screenshot on a daily schedule.
Default screenshot settings are Page Width: 1920 (px), Page Height: 1000 (px), Wait: 1500 (ms). Feel free to configure these settings in Power Automate to fit your needs.
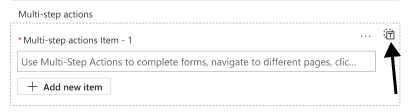
PagePixels Multi-Step works by making browser actions (click, input text, press enter, etc.) available for you to add, and then PagePixels runs those actions for you before taking the screenshot.
You can access Multi-Step functionality through the
Multi-Step Actions
field in the following Actions:
Take a Screenshot of a Web Page
Take a Screenshot from a Real Geographic Location
Take a Screenshot of Custom HTML
Take a Screenshot of a web page and analyze the image with AI
Multi-Step Actions
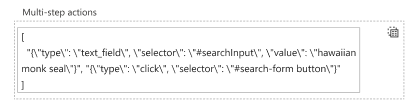
Here's a list of Multi-Step Actions you can use, and what the expected format is for Power Automate.
Important Note:
Multi-Step Actions must be in an array. To input your actions as array, use the text field option in Power Automate
as seen in the example.