How to add a team member to your PagePixels account

This help article explains how to create an admin and non-admin user for a team member in your PagePixels account.

Introduction

PagePixels does not have per-seat/per-user charges. You can add unlimited users at no additional cost, making it easy to collaborate with your team.

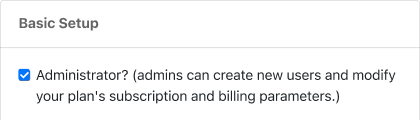
When adding a team member, you can assign them one of two roles:

  • Non-Administrators: Access to all screenshot management features, but no access to billing, plans, or team member creation/deletion.
  • Administrators: Full access to the account, including billing and user management. Administrators can upgrade or downgrade plans, view invoices, update payment information, add/delete users, in addition to all screenshot management tasks.

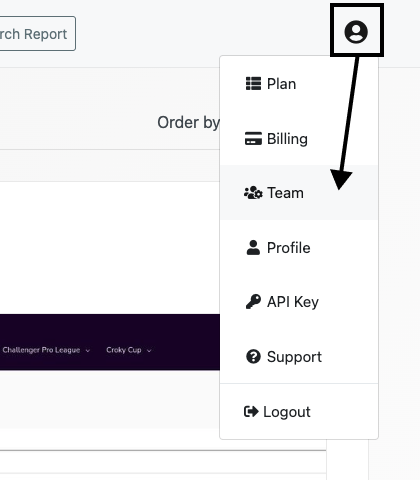
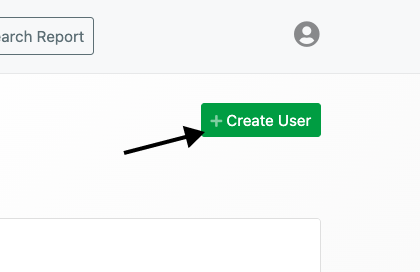
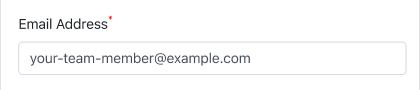
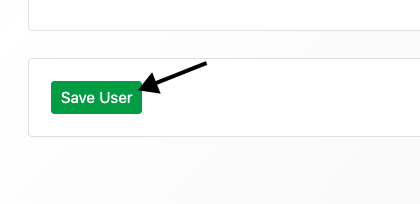
Ready to add your first team member? See below for the steps.

Steps to add a team member to your account

1

Log in to your PagePixels account.

2

Go to your team page

Click on the user icon and select the Team option from the dropdown menu.

3

Create user

Click the +Create user button.

If you'd like your team member to have admin privileges, check the Administrator box (otherwise leave it unchecked).

Add your team member's email address.

Optionally, add your team member's name and time zone (used for their Advanced Scheduling's default setting).

Set your team member's password. This is the password they will use to login to PagePixels.

Note: Both admin and non-admin users can change their account password.

Click the Save User button.

🎉 Your team member is now added to your PagePixels account.

Support

Questions? Contact us anytime by email:

support-tickets@pagepixels.com

Or send us a message through our Support page.