This guide goes over what the PagePixels node can do, how to connect PagePixels to n8n, how to schedule screenshots in your workflows, and how to create Multi-Step screenshots.
What Actions are Available?
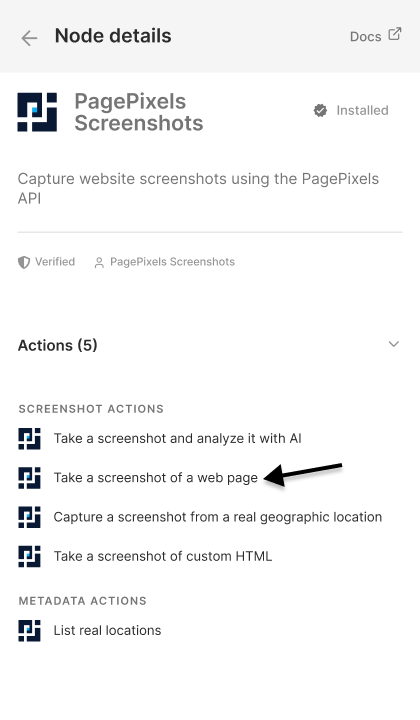
Below is a list of Actions you can perform using the PagePixels Screenshots n8n node.
Actions
Take a screenshot of a web page
Capture an instant screenshot from a URL.
Take a screenshot of custom HTML
Renders supplied custom HTML as an image. Useful for capturing screenshots of emails and data from third-party APIs.
Capture a screenshot from a real geographic location
Capture screenshots using residential proxies within a chosen location. Choose from hundreds of countries, major cities, and every US state.
Take a screenshot and analyze it with AI
Capture a web page screenshot and run AI analysis with a custom prompt. Useful for extracting data, generating summaries, or querying the website's content.
Lists real locations
Retrieves the available residential proxy locations.
How to connect PagePixels Screenshots to n8n
Below are the steps for how to connect PagePixels to n8n:
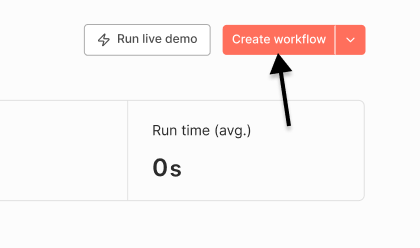
1
Create a new workflow
Log in to your n8n workspace. Click the Create workflow button.
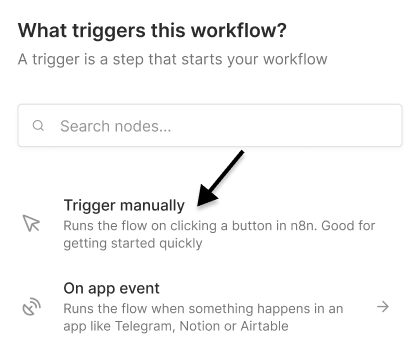
2
Add a trigger
Click the Add first step button.
Select and configure your trigger.
Note: For the quickest setup, choose the Trigger manually option.
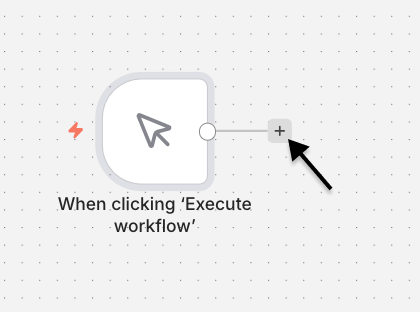
3
Install the PagePixels Screenshots node
Click the + button to add an action.
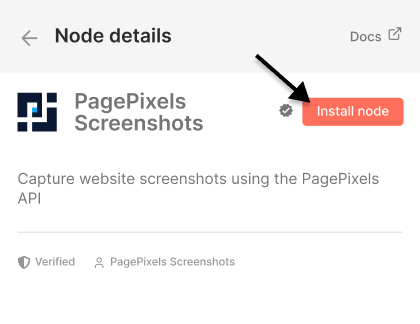
Search for and select the PagePixels Screenshots option.
Click the Install node button.
This will install and make the PagePixels node available to your workspace.
4
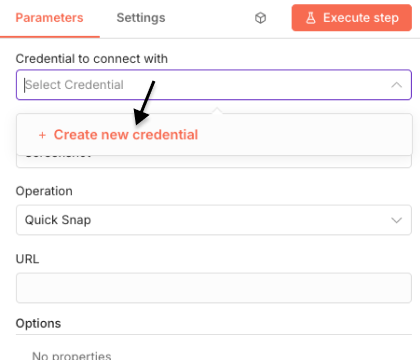
Select action and connect to PagePixels
Choose any of the available PagePixels actions.
Click Credential to connect with and select the + Create new credential option.
Using the PagePixels Take a screenshot of a web page action, you can automate taking screenshots of web pages on a recurring schedule within n8n.
For example, below are step-by-step instructions for how to create an hourly website screenshot workflow in n8n:
1
Create a new workflow
2
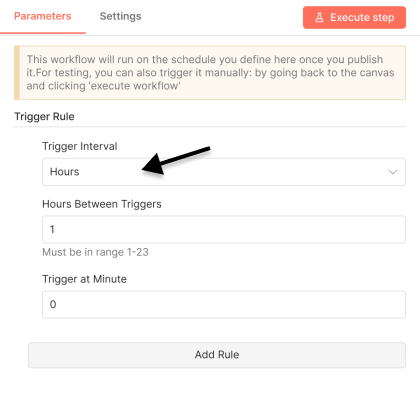
Schedule your automation
Click the Add first step button.
Select the On a schedule trigger.
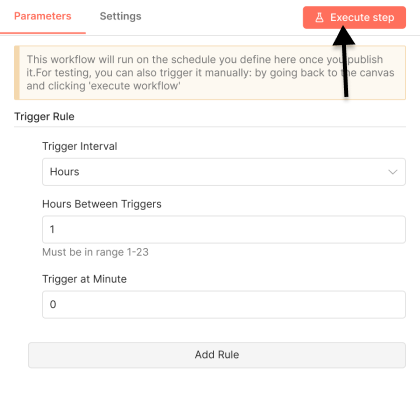
Configure your schedule. For an hourly screenshot, change the Trigger Interval field to the Hours option.
Click the Execute step button.
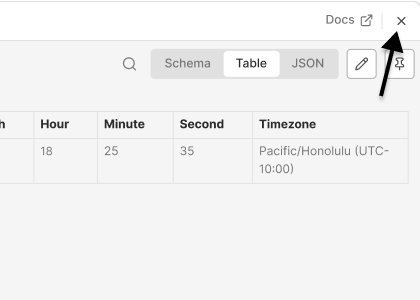
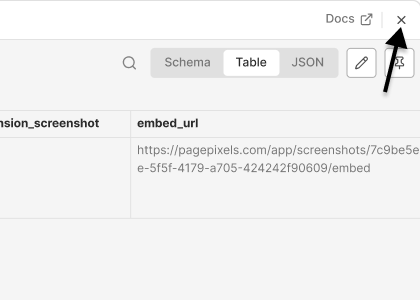
Once processed, click the X icon (top-right) to close the dialog.
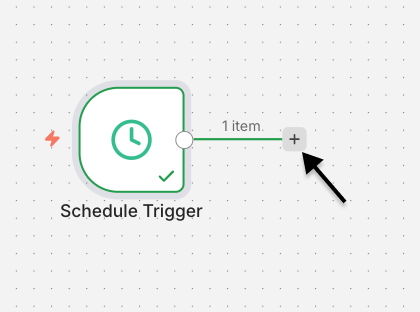
3
Add PagePixels Action
Click the + button.
Search for and select the PagePixels Screenshots option.
Choose the Take a screenshot of a web page action.
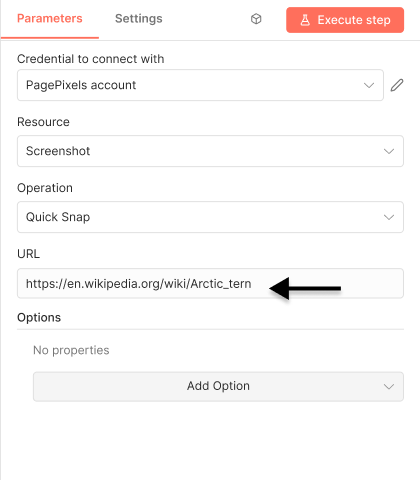
4
Configure your screenshot
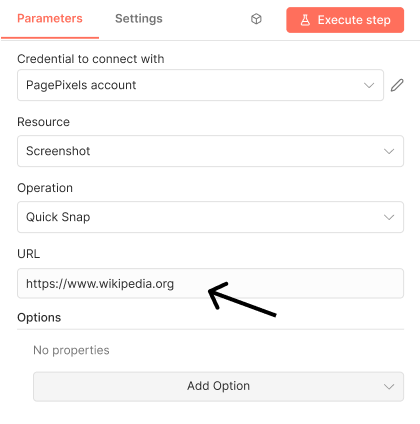
Copy and paste your website link into the URL field.
Note: The URL must include https:// or http:// at the start.
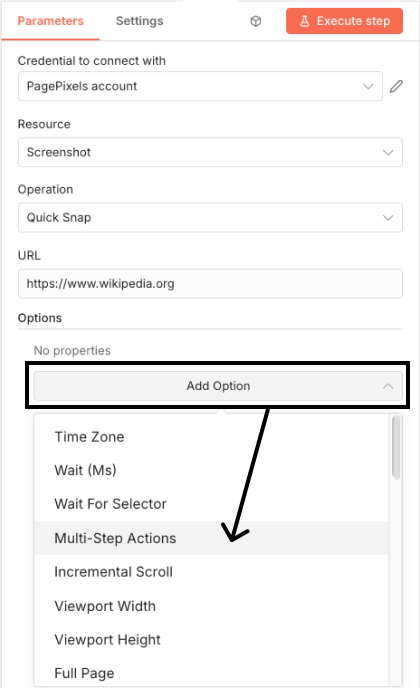
Optionally, use the 20+
screenshot options
available in the "Add Options" dropdown menu to configure your screenshot (e.g. full page, wait).
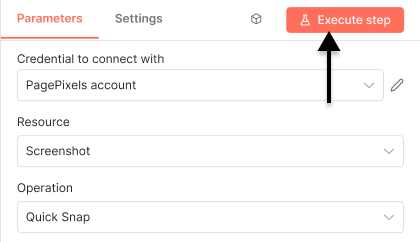
When you're ready, click the Execute step button.
Once processed, click the X icon (top-right) to exit.
5
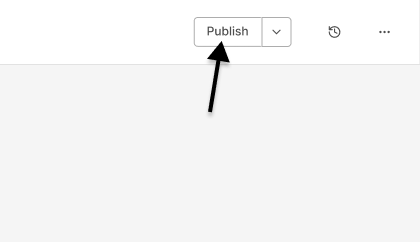
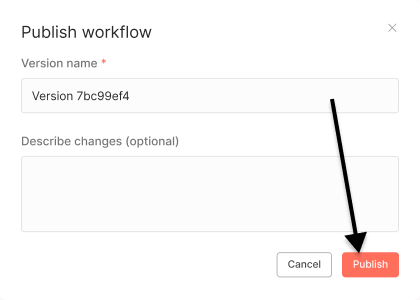
Publish your workflow
Click the Publish button at the top.
Name your workflow verison and optionally describe your changes. Click Publish.
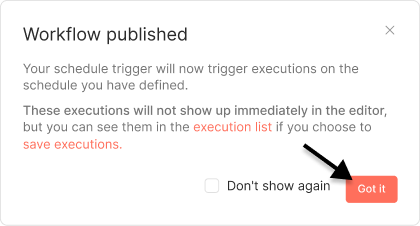
Your workflow is published. Click Got it to exit.
🎉 Your n8n workflow is now complete and will automatically take a screenshot on an hourly schedule.
Default screenshot settings are Page Width: 1920 (px), Page Height: 1000 (px), Wait: 1500 (ms). Feel free to configure these settings in n8n to fit your needs.
Multi-Step Screenshots in n8n
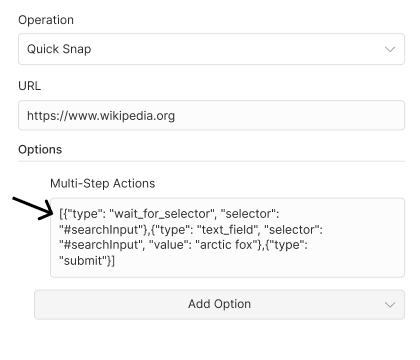
Use the PagePixels Multi-Step Screenshot feature in n8n to interact with websites before capturing a screenshot, so you can:
Fill out a password login form,
Perform a search,
Apply filters,
Navigate to another page,
And other user interactions.
PagePixels Multi-Step works by making browser actions (click, input text, press enter, etc.) available for you to add, and then PagePixels runs those actions for you before taking the screenshot.
You can access Multi-Step functionality through the
Multi-Step Actions
field in the following Actions:
Take a screenshot of a web page
Take a screenshot of custom HTML
Capture a screenshot from a real geographic location
Take a screenshot and analyze it with AI
Multi-Step Actions
Here's a list of browser actions (aka "Multi-Step Actions") you can use, and what the expected format is for n8n.
Make sure to escape special characters (e.g. quotes "", '') in your Multi-Step Action inputs. Otherwise, you'll get an error or your actions will not work as intended.