Guide to CSS Selector Screenshots

Learn how to take automatic screenshots of a specific element on a web page using PagePixels' CSS Selector feature.

Introduction

With PagePixels' CSS Selector feature, you can automatically take a screenshot of a particular area of a web page.

CSS Selector Screenshot functionality is available in the PagePixels web app, Screenshot API, Zapier, Make, and the Chrome Extension.

To get started, create your FREE PagePixels account today.

This guide goes over how CSS Selector Screenshots work and includes examples of how to create CSS Selector Screenshots in the PagePixels web app.

How CSS Selector Screenshots Work

To get PagePixels to screenshot a specific element on the page, you provide a unique CSS Selector that identifies the element (e.g. #thisbuttonid, .thisbuttonclass) in the CSS Selector field.

Not sure how to get a CSS Selector? The easiest method is to use your browser's developer tools and the "Copy Selector" option, as demonstrated in this screencast. Note: This method may not provide the most reliable or unique selector for your screenshot.

Want to learn more about CSS Selectors? You may find this Mozilla guide a helpful resource.

Need help with your CSS Selector Screenshot? Contact us.

CSS Selector Screenshot Examples

Below are examples to help demonstrate how you can automate capturing part of a web page using PagePixels' CSS Selector functionality.

Example: Screenshot only the comic element on the XKCD page

For this example, let's say you want to capture daily screenshots of just the XKCD comic element on this page: https://xkcd.com/902/

Below are step-by-step instructions for how you can create this screenshot in the PagePixels web app using the CSS Selector feature.

1

Open the web page

Visit the web page in an incognito browser. For example: https://xkcd.com/902

2

Open Dev Tools

Right-click on the element you want to screenshot, and select the "Inspect" option.

3

Confirm Element in Dev Tools

Hover over the element in your developer tool's Elements tab. This will highlight the element in the web page.

Confirm this is the element you want to screenshot and that the element has a height greater than 1px (e.g. this example shows 780 x 256 dimensions).

Note: If the element has a 0 height dimension (e.g. 256 x 0, 0 x 0), PagePixels cannot capture that specific element.

4

Copy Selector

Right-click on the element in the "Elements" tab. Click Copy and select the Copy selector option.

5

Create Screenshot in PagePixels

Log in to your PagePixels account, and click the "+Create Screenshot" button.

6

Add CSS Selector

Paste the selector you copied into the CSS Selector field.

7

Set your schedule

By default, recurring screenshots are taken every 5 minutes.

For a daily screenshot, use the input and dropdown fields to change the default values to: 1 Days

8

Add URL

Copy and paste URL into the Website URL to Capture field.

9

Save Screenshot

Click the green Save Screenshot button (top-right).

Your CSS Selector Screenshot automation is now running and your first screenshot will be taken shortly.

Example:

Example: Capture only the infobox element on a Wikipedia page

For this next example, let's say you want to capture daily screenshots of just the information box element on this Wikipedia page: https://en.wikipedia.org/wiki/Callistoctopus_luteus

Below are step-by-step instructions for how you can create this screenshot in the PagePixels web app using the CSS Selector feature.

1

Open the web page

Visit the web page in an incognito browser. For example: https://en.wikipedia.org/wiki/Callistoctopus_luteus

2

Open Dev Tools

Right-click on the element you want to screenshot, and select the "Inspect" option.

3

Confirm Element in Dev Tools

Hover over the element in your developer tool's Elements tab. This will highlight the element in the web page.

Confirm this is the element you want to screenshot and that the element has a height greater than 1px (e.g. this example shows 265.65 x 567.46 dimensions).

Note: If the element has a 0 height dimension (e.g. 256 x 0, 0 x 0), PagePixels cannot capture that specific element.

4

Get CSS Selector

For this example, we're going to use the unique class "infobox" on the table element as the selector:

table.infobox

Note: We're using this selector and not the one provided by the "Copy selector" function (i.e. #mw-content-text > div.mw-content-ltr.mw-parser-output > table.wikitable.float-right) for better stability.

5

Create Screenshot in PagePixels

Log in to your PagePixels account, and click the "+Create Screenshot" button.

6

Add CSS Selector

Enter the selector for the element into the CSS Selector field.

7

Set your schedule

By default, recurring screenshots are taken every 5 minutes.

For a daily screenshot, use the input and dropdown fields to change the default values to: 1 Days

8

Add URL

Copy and paste the URL into the Website URL to Capture field.

9

Save Screenshot

Click the green Save Screenshot button (top-right).

Your CSS Selector Screenshot automation is now running and your first screenshot will be taken shortly.

Example:

Frequently Asked Questions

I'm getting a Node has 0 height error. How do I resolve this?

This error occurs if the element you've selected has no height. To resolve, you'll need to select a different element on the page that has a minimum 1px height.

I'm getting a 'clip' and 'fullPage' are mutually exclusive error. How do I resolve this?

You'll need to uncheck the Full Page option to resolve the error.

The 'clip' is referring to the CSS Selector field. Since it's not possible to produce a screenshot that captures both a single element and a full page of content at the same time, this error is the result.

There's additional information in the element that I don't want to appear in the screenshot. Is there something I can do?

You can remove elements you don't want in the screenshot using the CSS Injection field in PagePixels.

For example: #element-to-remove{display:none !important;}

Want to learn more about CSS? Mozilla has great documentation.

Need help getting your screenshot to look just right? Contact us and we can help.

Is there a way I can test if I have the CSS Selector without using up a screenshot in PagePixels?

Yes. You can use your browser developer tools' "Capture node screenshot" function on the element to get an idea of how the screenshot will look in PagePixels.

For example:

Note: The screenshot produced by the "Capture node screenshot" function may not exactly match the result in PagePixels.

Help with CSS Selector Screenshots

We understand that CSS Selectors can be tricky at first, and we're happy to offer free personalized setup guidance for your first 
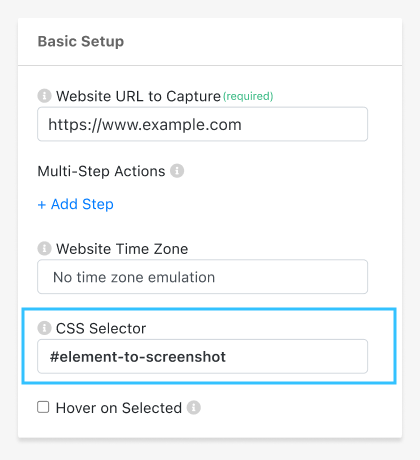
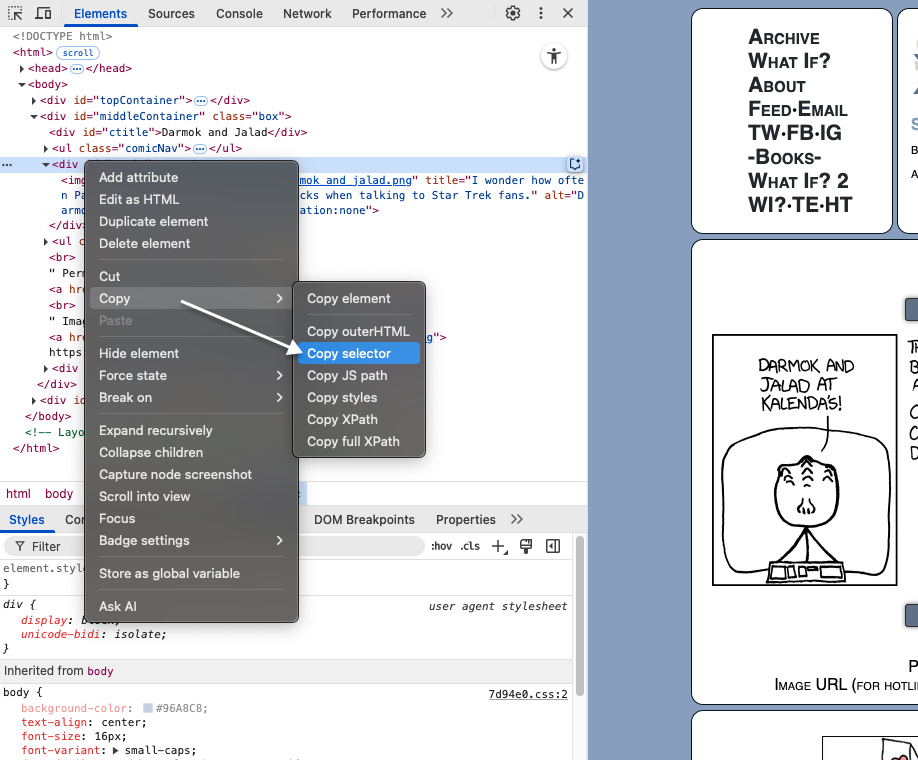
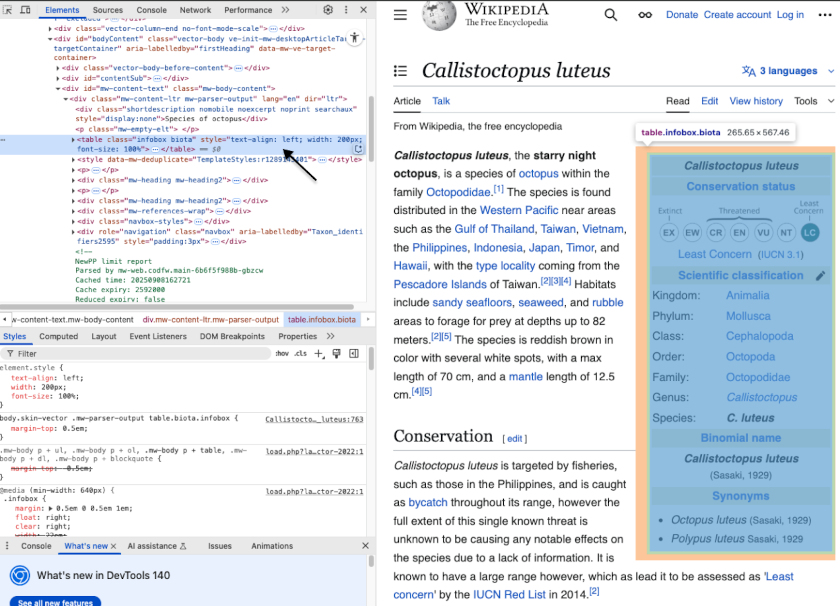
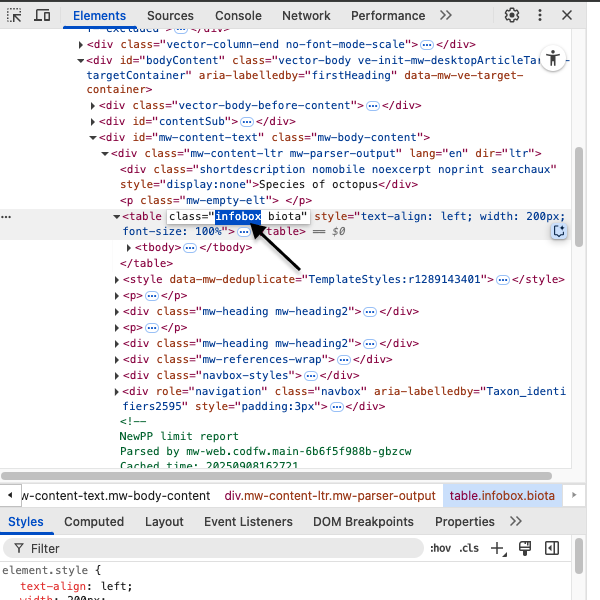
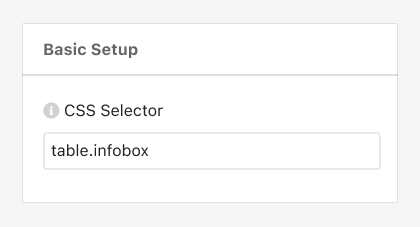
CSS Selector Screenshot.

To help us assist you effectively, please share the following information:

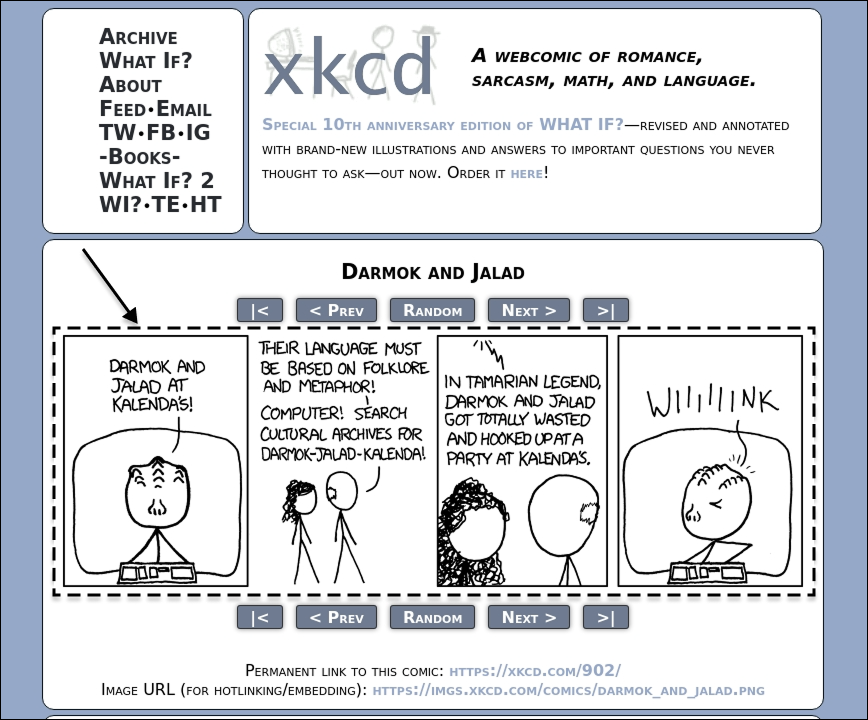
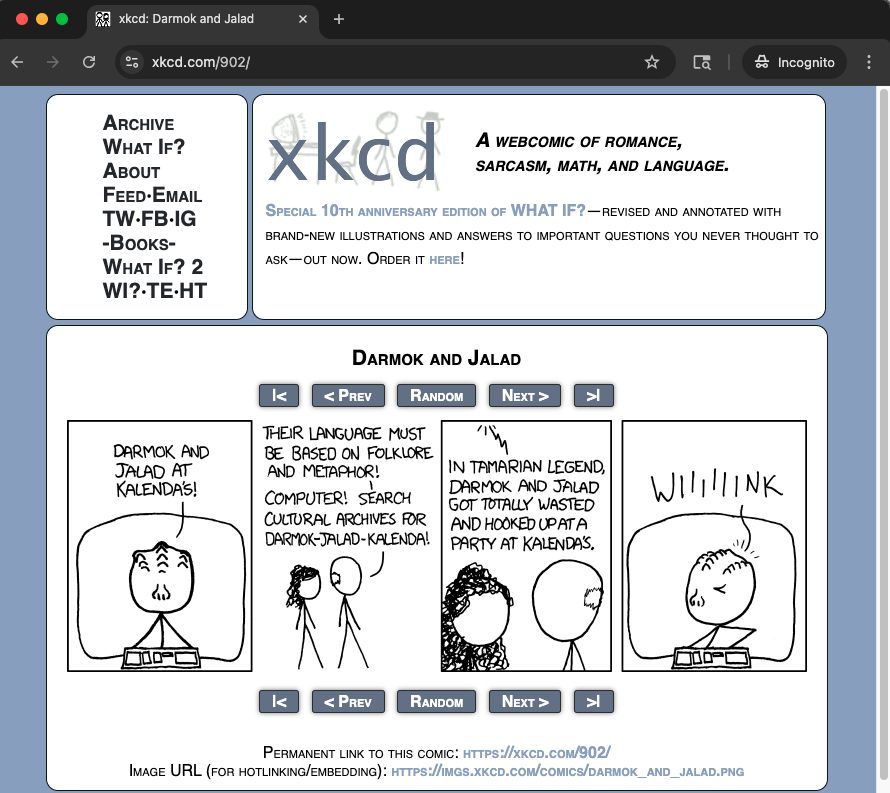
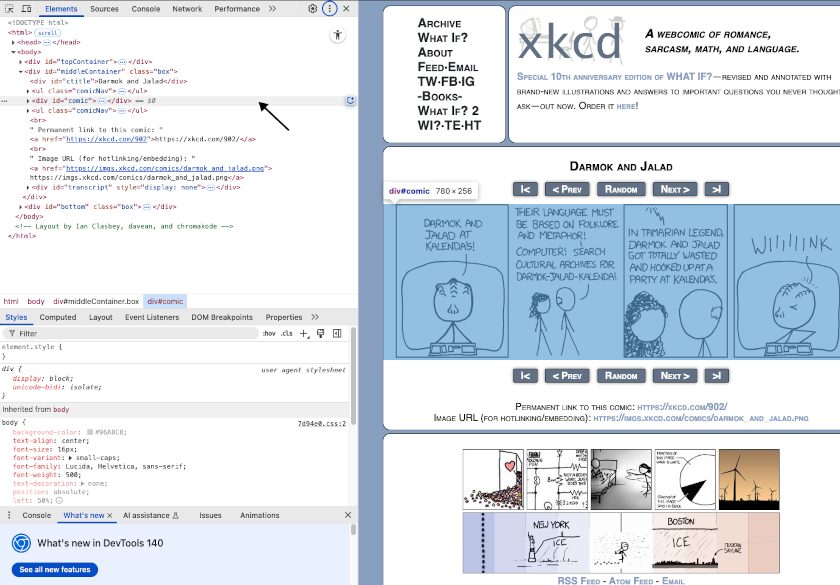
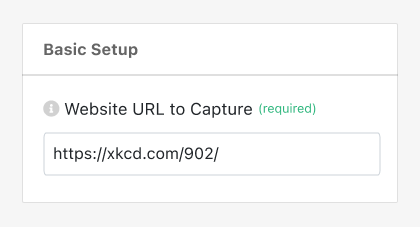
  • The URL for the web page where the content you want to capture is located.
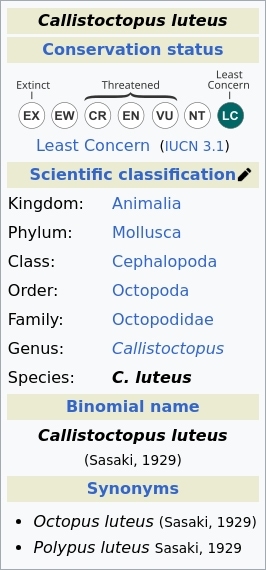
  • An image example of how you'd like the final screenshot to look.
  • Let us know where you're using PagePixels: our web app, API, Zapier, Make, or something else.

Please send the information from the email associated with your PagePixels account to:

support-tickets@pagepixels.com

___

Need help setting up more than one CSS Selector Screenshot? We offer Premium Support for additional full guided setups of CSS Selector Screenshots.

Premium Support starts at $300 USD and includes:

  • A full review of your use case. This includes an evaluation to ensure the CSS Selector feature is a viable solution for your needs. If it's not, we will offer possible alternatives.
  • The steps needed to complete the task specific to the app you're using or our API.
  • Recommendations tailored to your setup
  • Guided support to help get you unblocked

For a full quote, please contact us with your requirements at the email above.

Note: We're always happy to answer specific questions or help troubleshoot issues for free. Premium Support is only required if you'd like us to handle the full step-by-step setup for additional CSS Selector Screenshots.

Support

Questions? Contact us anytime by email:

support-tickets@pagepixels.com

Or send us a message through our Support page.