How to automatically take and save screenshots to Google Drive with Zapier

Learn how to capture automatic screenshots of websites and upload the screenshot images to Google Drive in your Zapier automations with the PagePixels Screenshots Zapier app.

Introduction

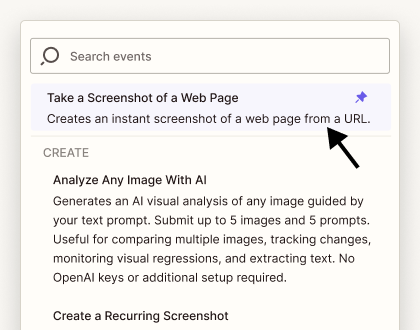
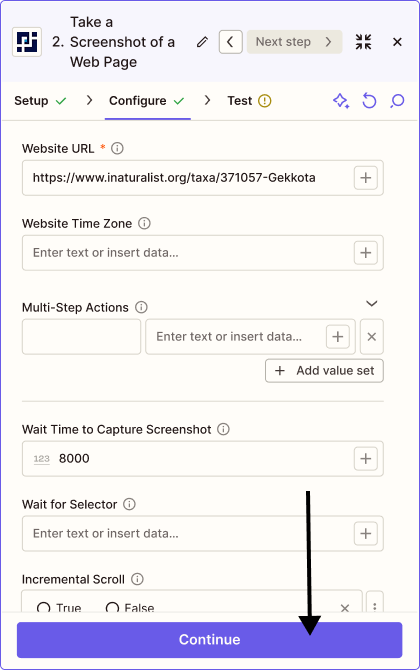
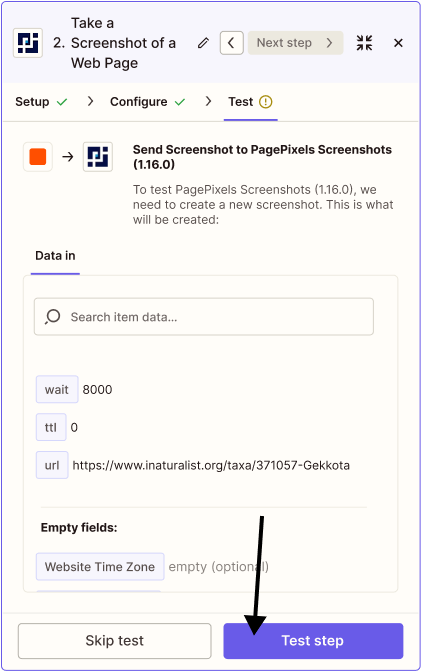
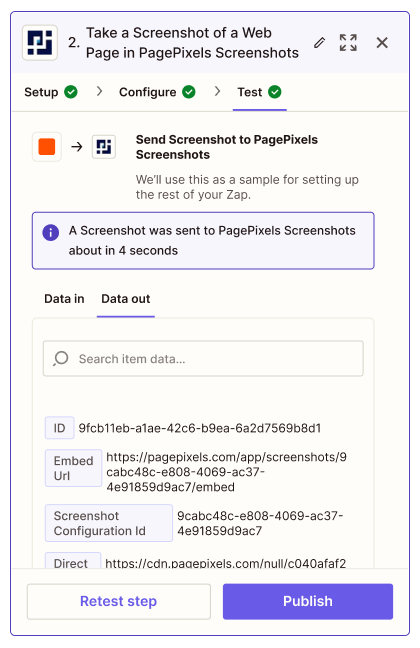
Using the PagePixels Screenshots Zapier app, you can automatically take screenshots and send the images to thousands of services, including Google Drive.

PagePixels and Zapier are free to try, and this tutorial demonstrates how to take daily screenshots of a web page and save the images to a Google Drive folder.

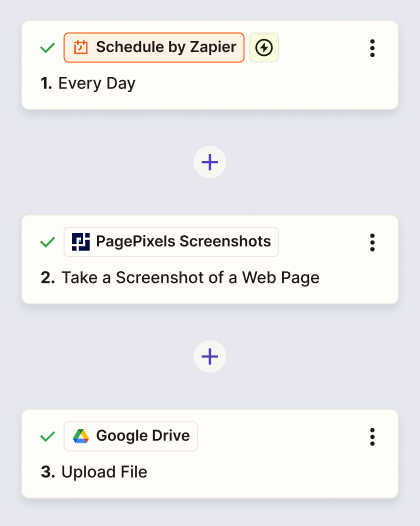
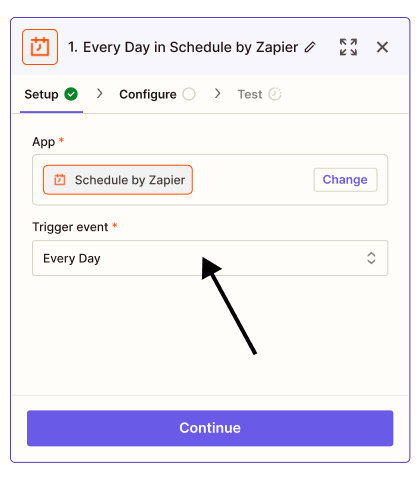
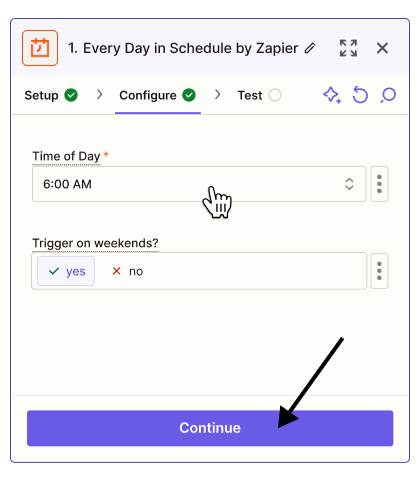
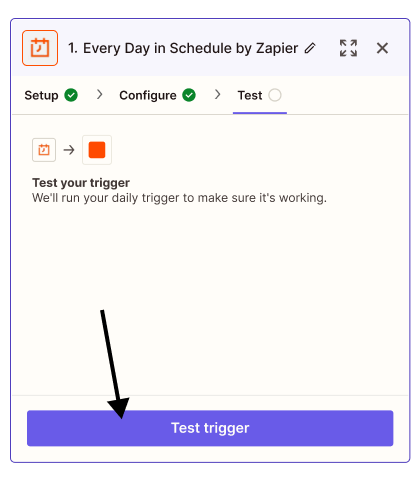
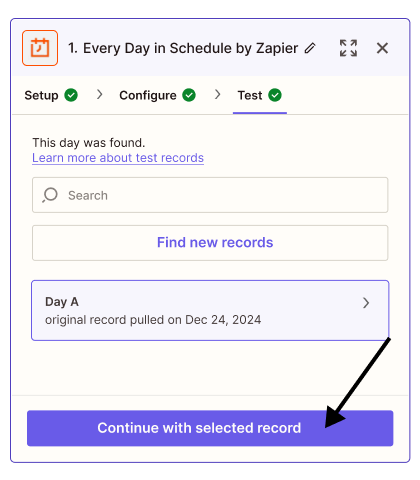
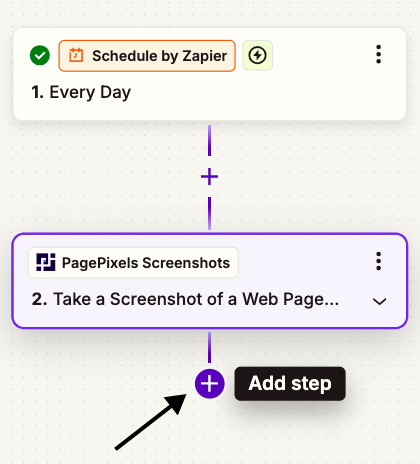
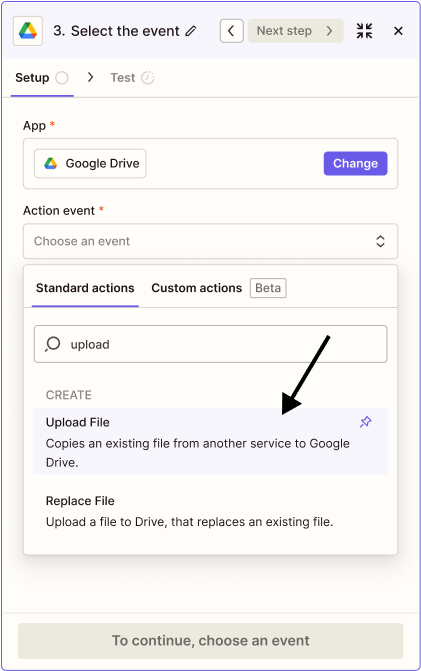
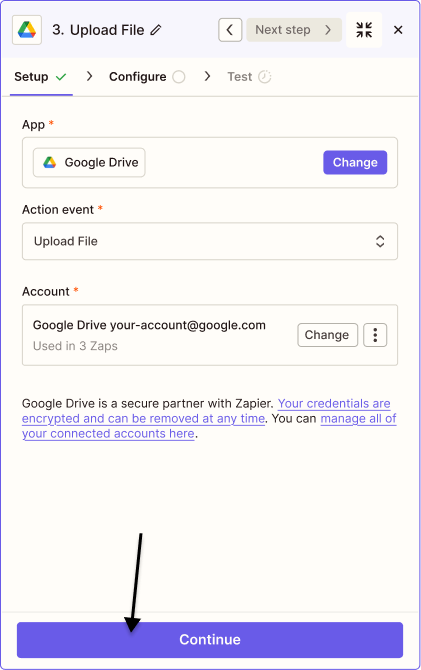
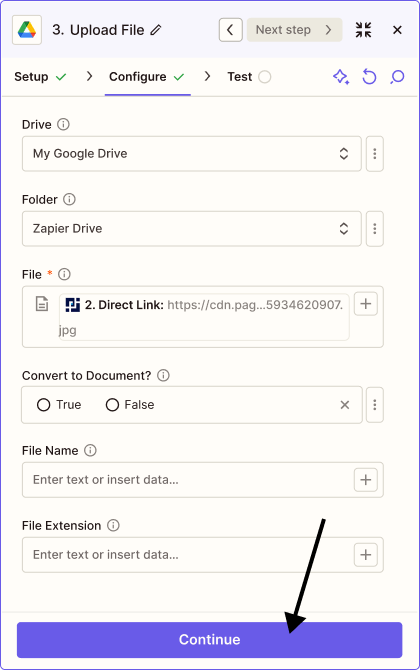
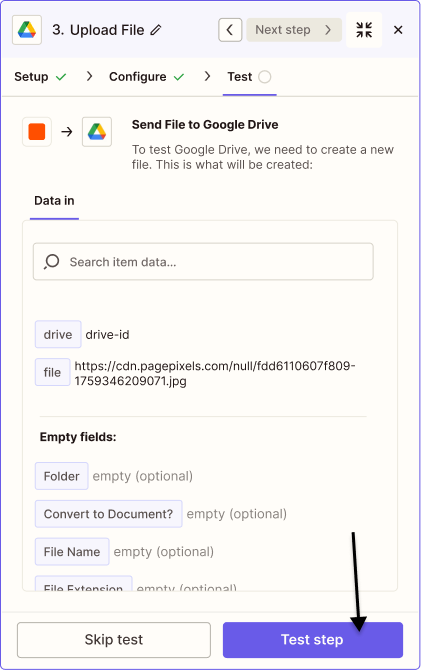
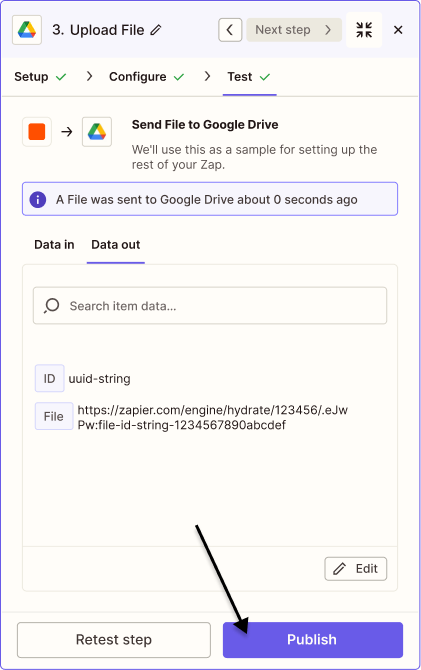
Zapier automation (Zap) we'll create in this tutorial:

Displays the Schedule by Zapier Every Day app connecting to PagePixels Screenshots Take a Screenshot of a Web Page action which then connects to Google Drive's Upload file app event

How to take and save automatic screenshots to Google Drive using Zapier

To capture daily screenshots of a web page and upload the images to Google Drive using Zapier:

1

Create a new Zap

Click "Create", then select "Zap" from the list of options.

2

Set up your Schedule Trigger app event

Click the Trigger button.

Click Zapier's Schedule app.

Select the Every Day app event.

Configure your desired schedule and click the Continue button.

Click Test trigger.

Click Continue with selected record to finish setting up your Trigger app event.

3

Set up PagePixels Take Screenshot of a Web Page Action app event

Search and select the PagePixels Screenshots app.

Select the Take a Screenshot of a Web Page Action event.

Choose or connect your PagePixels account.

Click the Continue button.

Add the URL for the page you want to capture into the Website URL field.

Configure your screenshot to your needs. For instance, to allow more time for the web page to load, you can set the Wait Time to Capture Screenshot field to 8000 ms.

Click Continue.

Click Test step. .

Preview the test response.

4

Upload the screenshot to Google Drive

Click the plus Add Step button.

Search for and select the Google Drive app.

Search and select the Upload file action event.

Choose or connect your Google Drive account.

Click Continue.

To upload your screenshot, click the plus button in the File field and select the Direct Link item from PagePixels.

Finish configuring your file upload. Click Continue.

Click Test Step.

Click Publish to activate your Zap automation.

EXAMPLE RESULT

Your Zapier screenshot automation is now active and will automatically capture screenshots with PagePixels and upload the images to your Google Drive on the schedule you set.

See our Zapier Help Guide for more comprehensive information about our Zapier integration.

Need help with your screenshot automations? Contact us.

What else can PagePixels do?

When you automate screenshots with PagePixels and Zapier, you can also:

  • Automate clicking buttons, filling out forms, performing a search, and more - all before taking a screenshot with Multi-Step functionality in Zapier.
  • Capture screenshots from different locations around the world in Zapier using the PagePixels Take a Real Geolocation Screenshot Action.
  • Take and have AI process your screenshots with the PagePixels Take a Screenshot of a Web Page and Analyze the Image With AI Action in Zapier.
  • Compare, contrast, and extract insights from multiple screenshots and other images with the PagePixels' Analyze Any Image with AI Action in Zapier.
  • Use an Embed URL to dynamically share and display the latest screenshot on your website, dashboard, presentation app, and more.
  • Remove elements and customize the style of your resulting screenshots with PagePixels' Custom CSS injection feature.
  • Take screenshots of entire webpages with the Full Page option. Or use a CSS Selector to capture only a specific part of a webpage.
  • Block ads and get rid of cookie banners from your screenshots with No Ads and No Cookie Banners options in the PagePixels Zapier app.
  • Automate structured data extraction and AI-powered text analysis across multiple domains with Domain Research Actions in Zapier.

Discover even more possibilities of what you can do on our Features page →

Support

Questions? Contact us anytime by email:

support-tickets@pagepixels.com

Or send us a message through our Support page.