How to automate Netlify app web page screenshots

Learn how you can take automatic screenshots of your Netlify app content using the PagePixels web app.

Introduction

PagePixels is a screenshot automation solution you can use to take screenshots of web pages, including screenshots of your Netlify app pages.

PagePixels is free to start, and below are step-by-step instructions for how to automate capturing screenshots in the PagePixels web app.

How to automate screenshots of Netlify app pages

To automatically screenshot your Netlify pages in the PagePixels web app:

1

Create a screenshot

Log in to your PagePixels account, and click the +Create Screenshot button.

2

Set your schedule

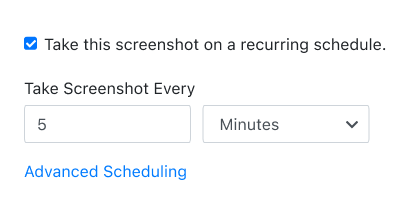
Scheduled screenshots are set to every 5 minutes by default.

To change the default setting, update the input values.

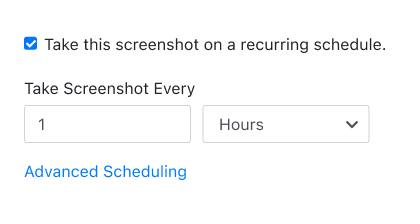
For example, if you'd like to take a screenshot every hour, you can change the values to: "1" "Hours"

Note: Want to schedule screenshots by time of day, days of the week, and time zone? See our scheduling screenshot guide for examples.

3

Add your URL

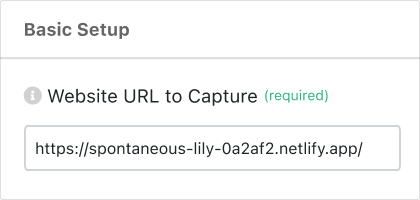
Copy and paste your Netlify app's web page URL into the Website URL to Capture field.

4

(Optional) Configure your screenshot

Use the 20+ setting options to adjust the screenshot results to your needs.

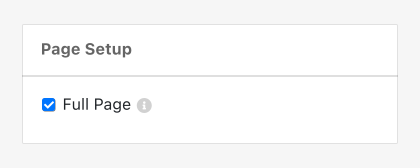
For example, to take a full page screenshot you can check the Full Page option.

5

Save Screenshot

Click the Save Screenshot button (top-right).

Your Netlify screenshot automation is now running and your first screenshot will be taken shortly.

Need help automating screenshots for your use case? Contact us.

What else can PagePixels do?

When you automate screenshots with PagePixels, you can also:

  • Schedule website screenshots by time interval, days of the week, time of day, and time zone using PagePixels' built-in scheduling system.
  • Automatically post screenshots to a Slack channel, a Custom Webhook address, or save the images in your Dropbox account.
  • Automate filling out forms, performing searches, applying filters to datasets, and more - all before taking a screenshot with Multi-Step Screenshot functionality.
  • Dynamically display the most up-to-date screenshot on your website, data visualization tool, and app with a single Embed URL.
  • Remove elements and customize the style of your screenshot with PagePixels' Custom CSS feature.
  • Capture website screenshots from different locations around the world with the Real Location Screenshots feature.
  • Convert data from third-party APIs, HTML emails, and other HTML content into screenshots using the Custom HTML Screenshots feature.
  • Automatically take screenshots and have an AI analyze the resulting images with the AI Analysis Screenshot feature.
  • Block ads and stop cookie banners from showing up in your screenshots.
  • Automatically integrate your screenshots with thousands of services with PagePixels' Zapier, Make, n8n, or Power Automate integrations.
  • Empower your AI assistant with advanced screenshot capabilities by adding the PagePixels Screenshot MCP Server as a tool.
  • Use PagePixels Screenshots API to add screenshot automation to your web application.
  • Have AI compare and contrast your screenshots and other images with the Multiple Image AI Analysis endpoint of our Screenshot API.
  • Capture automatic screenshots of content requiring advanced authentication using the PagePixels Screenshots Chrome Extension.
  • Automate structured data extraction and AI-powered text analysis for your marketing, sales, and lead generation needs with PagePixels' Domain Research feature.

Explore even more of what you can do with PagePixels on our Features page →

Support

Questions? Contact us anytime by email:

support-tickets@pagepixels.com

Or send us a message through our Support page.